
BluePrint Cabinets / Installation guide
How to Install Your Pull-Out Waste Bins
Follow these steps to install your pull-out waste bin drawer, align the finished front, and position the bins so they can be removed easily.
You’ll need the supplied drawer parts and hardware, a drill/driver, a tape measure, and a saw for trimming the wooden bin spacer.
Step 1Attach the drawer slides to the base board
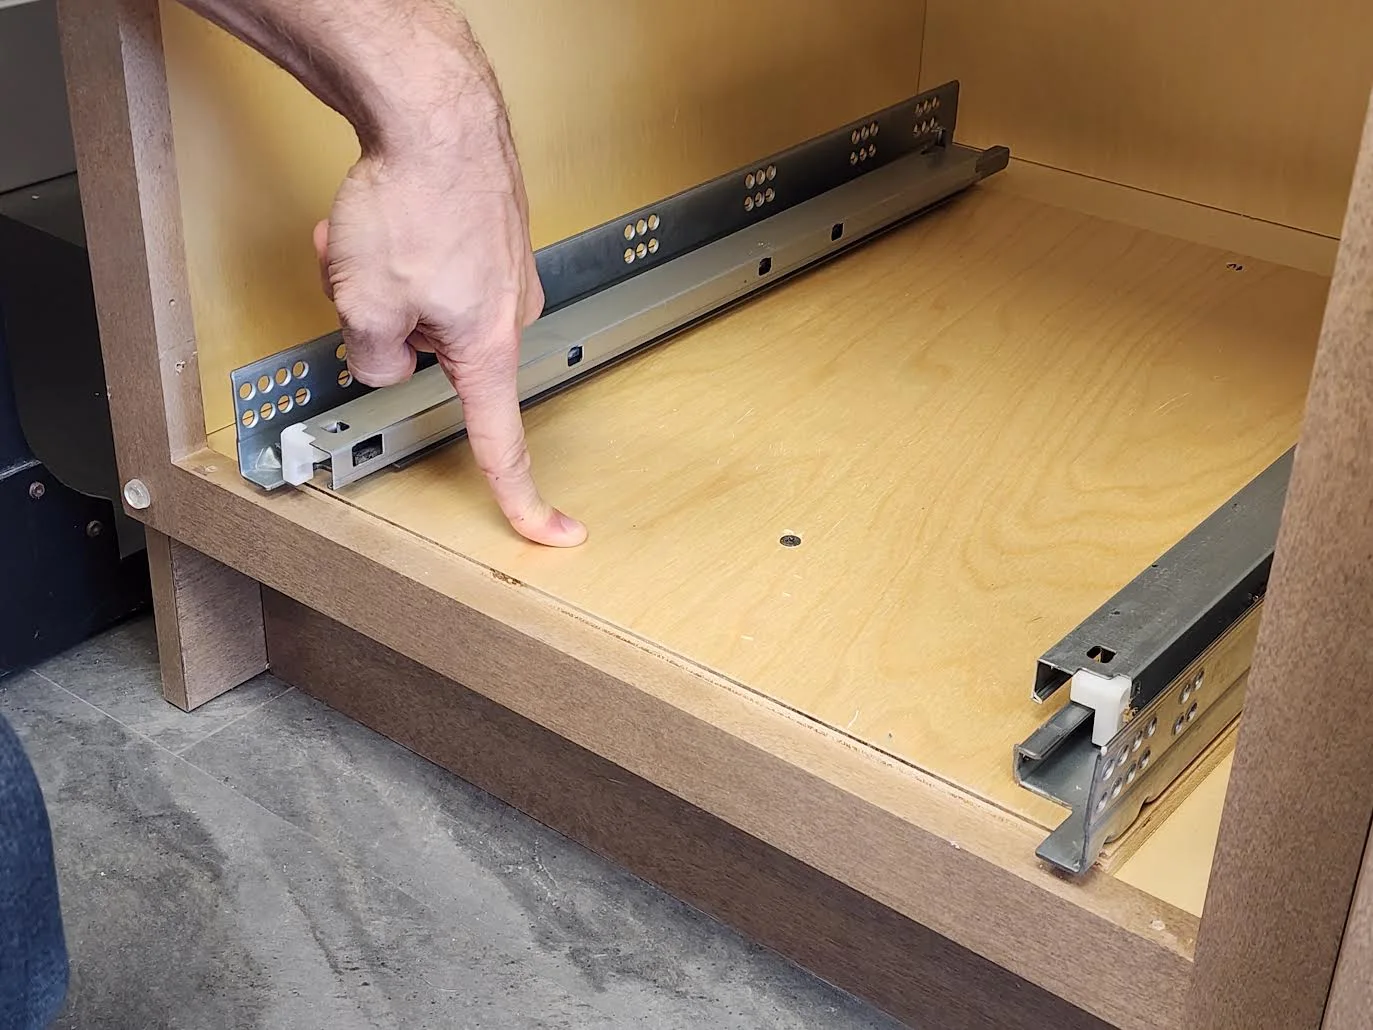
Fit a drawer slide along each side of the supplied plywood base board. Attach the slides to the board in the orientation shown. This board will sit in the bottom of the cabinet.
Step 2Secure the assembly inside the cabinet
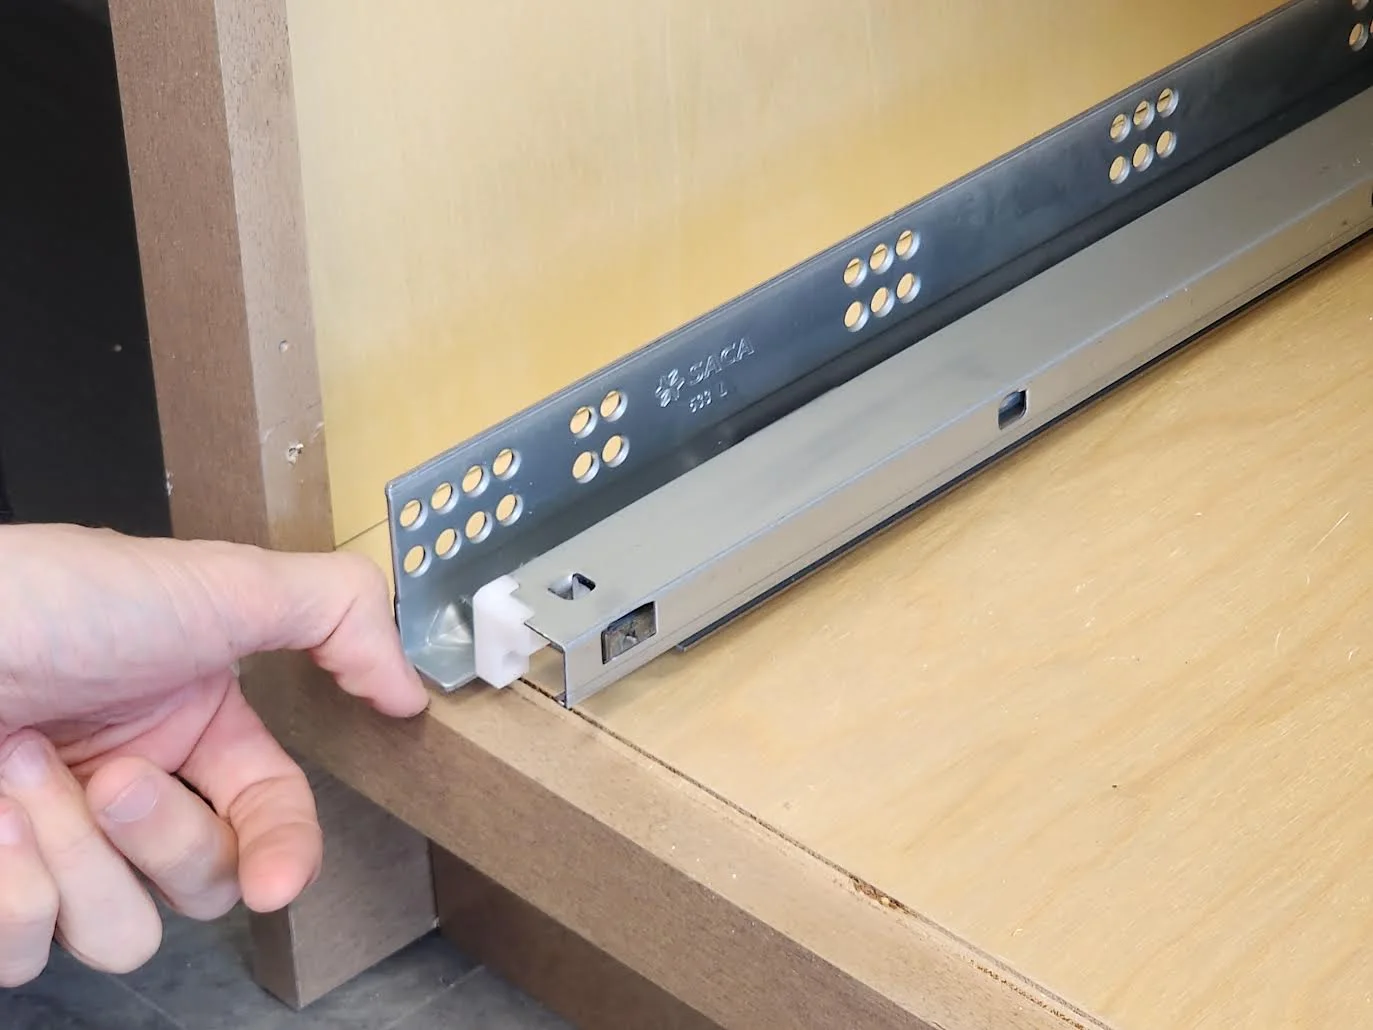
Position the front ends of the drawer slides approximately ⅛ inch behind the front of the cabinet face frame. Then secure the slides to the cabinet sides and fasten the plywood board to the cabinet bottom. Check that both slides extend freely.
Watch
Installing the base board and slides
Step 3Mount the metal brackets to the drawer box
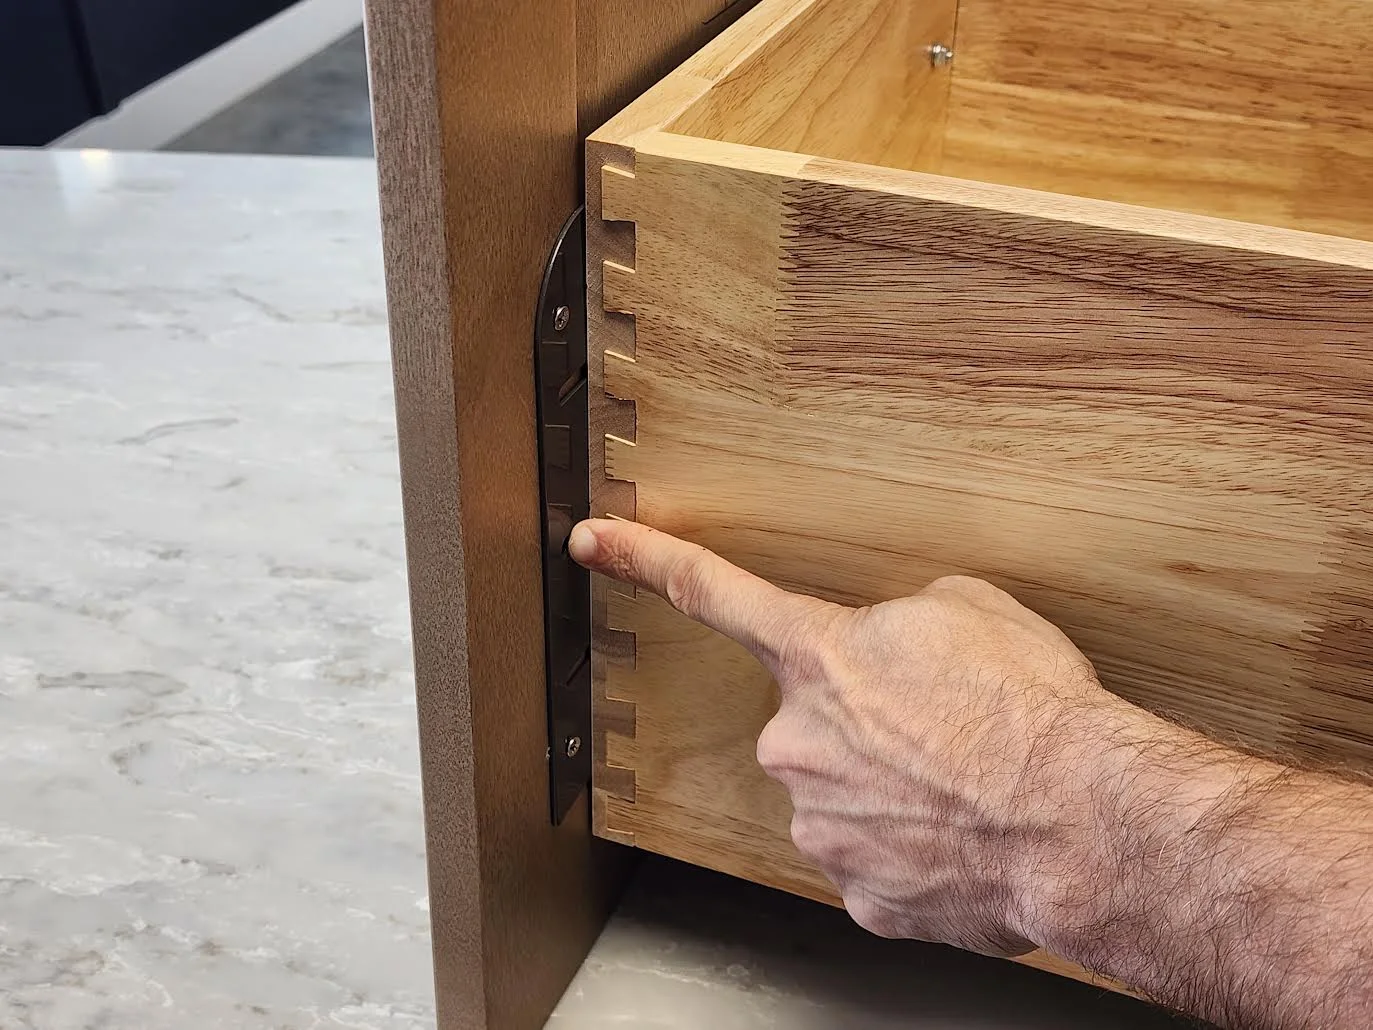
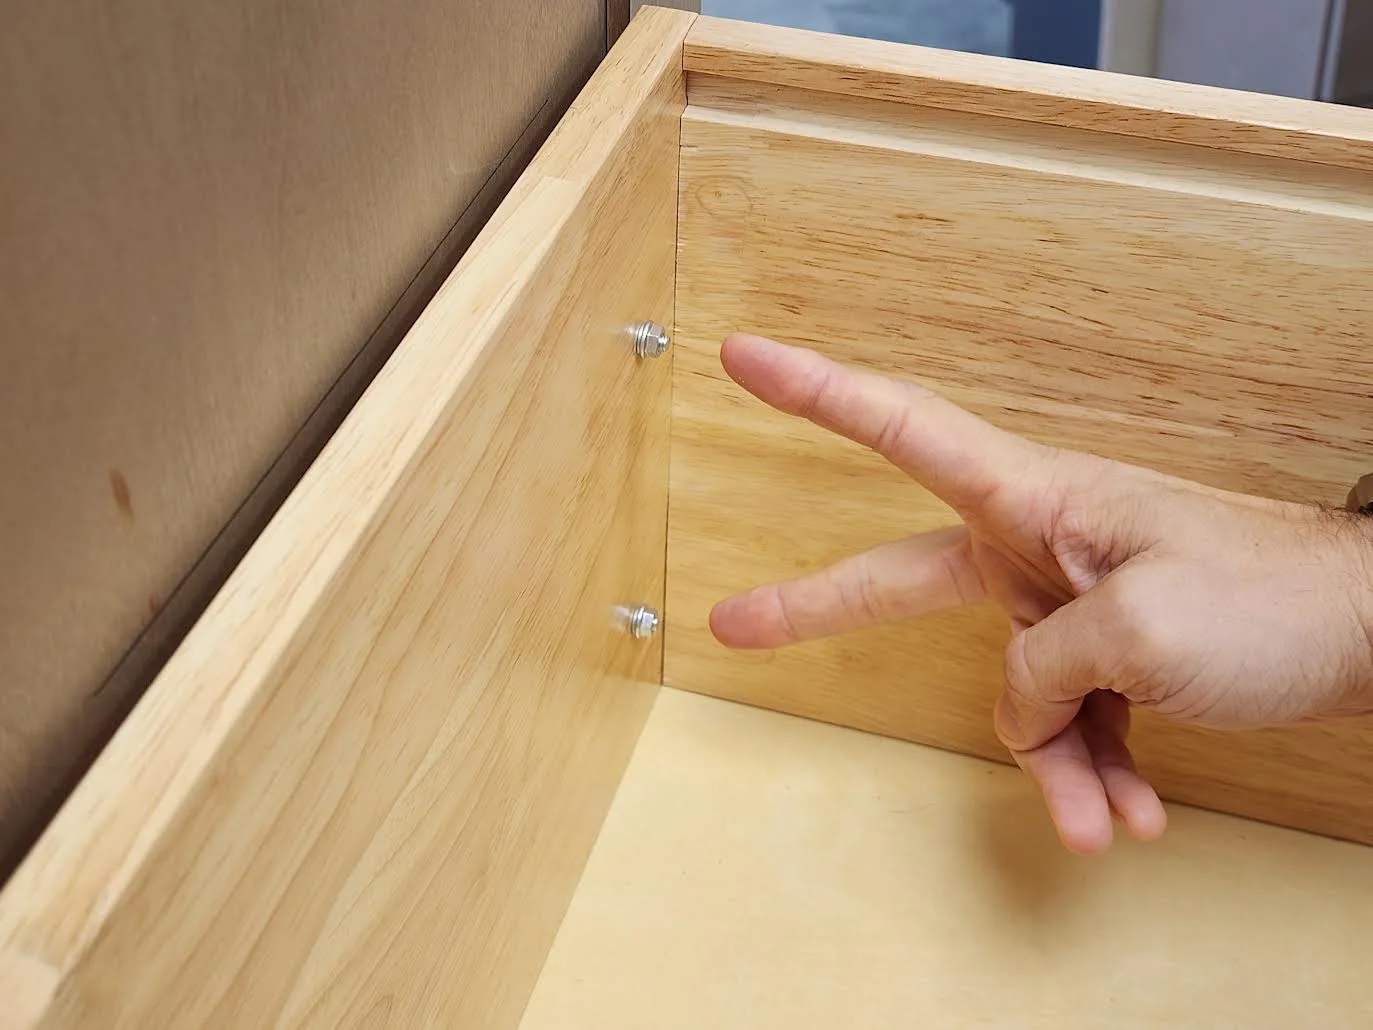
Set the wooden waste bin drawer box on a work surface. Place the metal mounting brackets on the outside of its front panel. Pass the mounting bolts through the wooden front panel and tighten them to secure both brackets. These brackets will hold the finished drawer front.
Watch
Attaching the metal brackets
Step 4Attach and align the finished drawer front
Lay the finished drawer front face down on a clean, protected surface. Place the drawer box on the back of the front, with the mounting brackets facing down toward it.
Use the standard alignment measurements: 10½ inches from the top edge of the finished front to the top of the drawer box, and 1 7/16 inches from each side edge to the corresponding side of the drawer box.
Check that the box is centred and square. Drive screws through the mounting brackets into the back of the finished front. Make sure the screws are short enough that they cannot come through the finished face.
Watch
Measuring and attaching the finished drawer front
Step 5Install the drawer slide retention clips
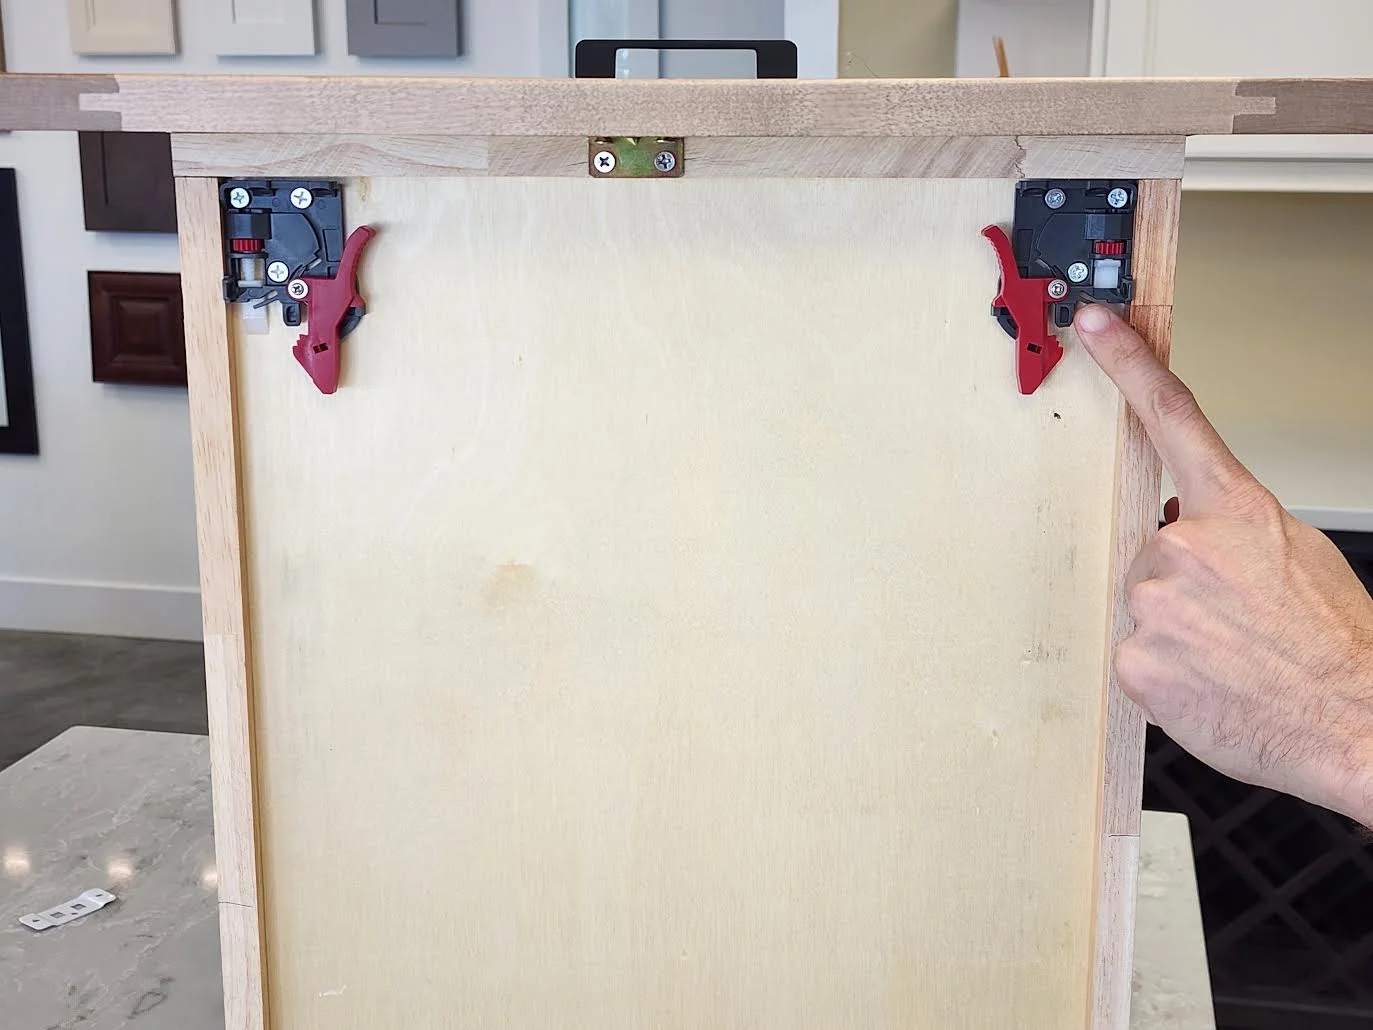
Turn the assembled drawer box over to reach the underside. Attach one black-and-red retention clip at each front corner, with the clips oriented as shown. These clips connect the wooden drawer box to the drawer slides.
Watch
Installing the retention clips
Step 6Connect the drawer box to the slides
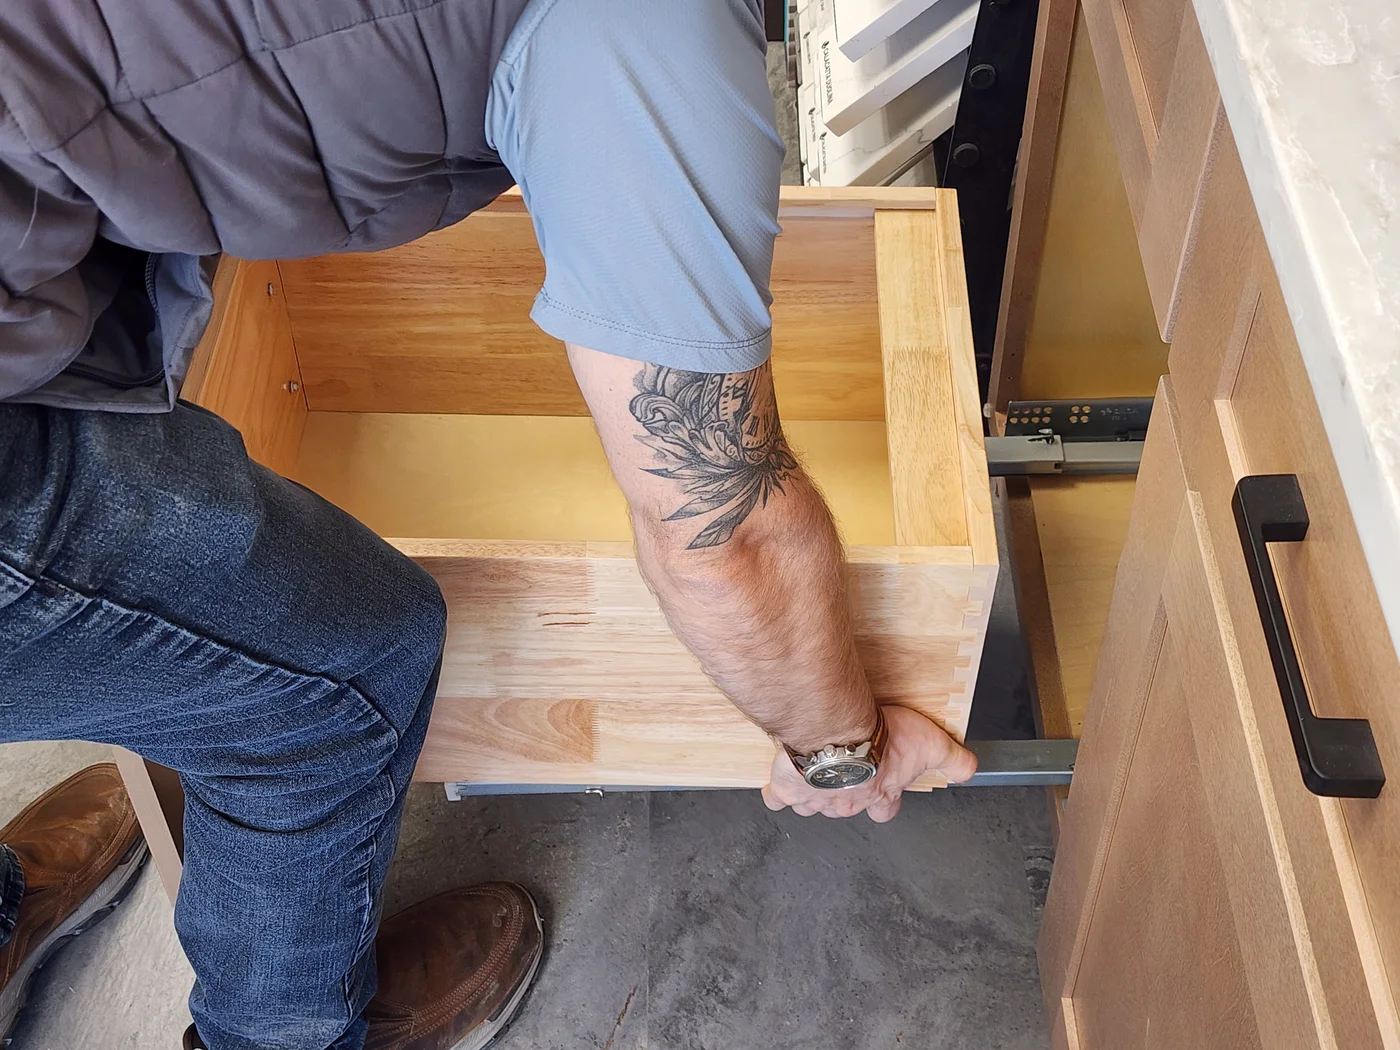
Pull both drawer slides out from the cabinet. Support the wooden drawer box and carefully lower it onto the extended slides. Line up the slide rails with the retention clips underneath the box and guide the rails into the clips until connected.
Push the pull-out closed gently, then open it again. It should move smoothly and stay connected to both slides. If it does not seat properly, stop and check the alignment rather than forcing it.
Step 7Trim and reposition the bin spacer
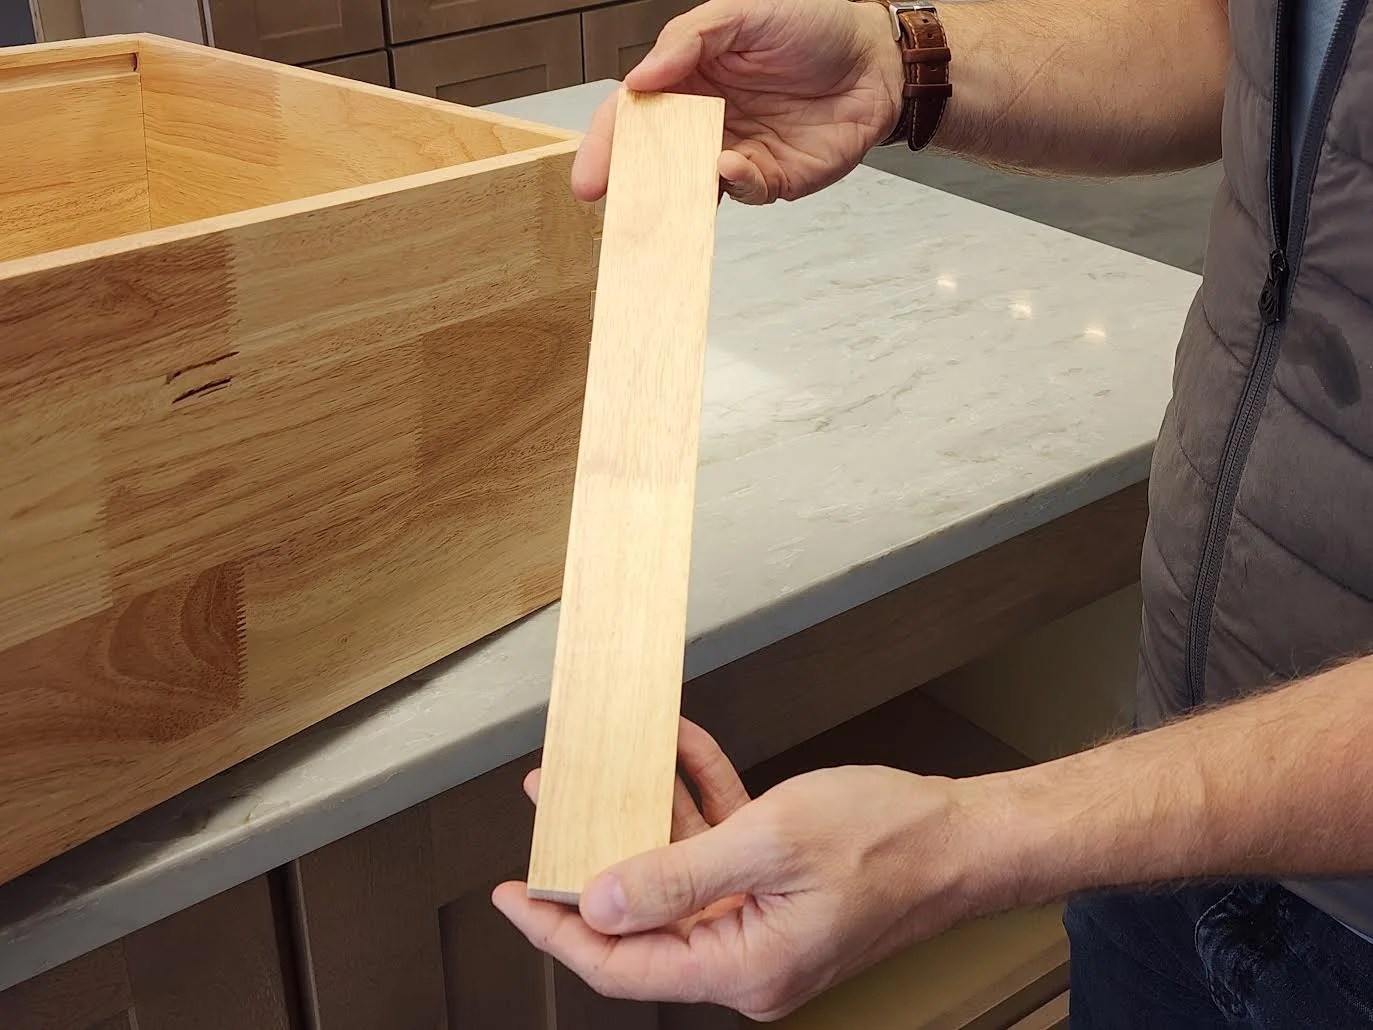
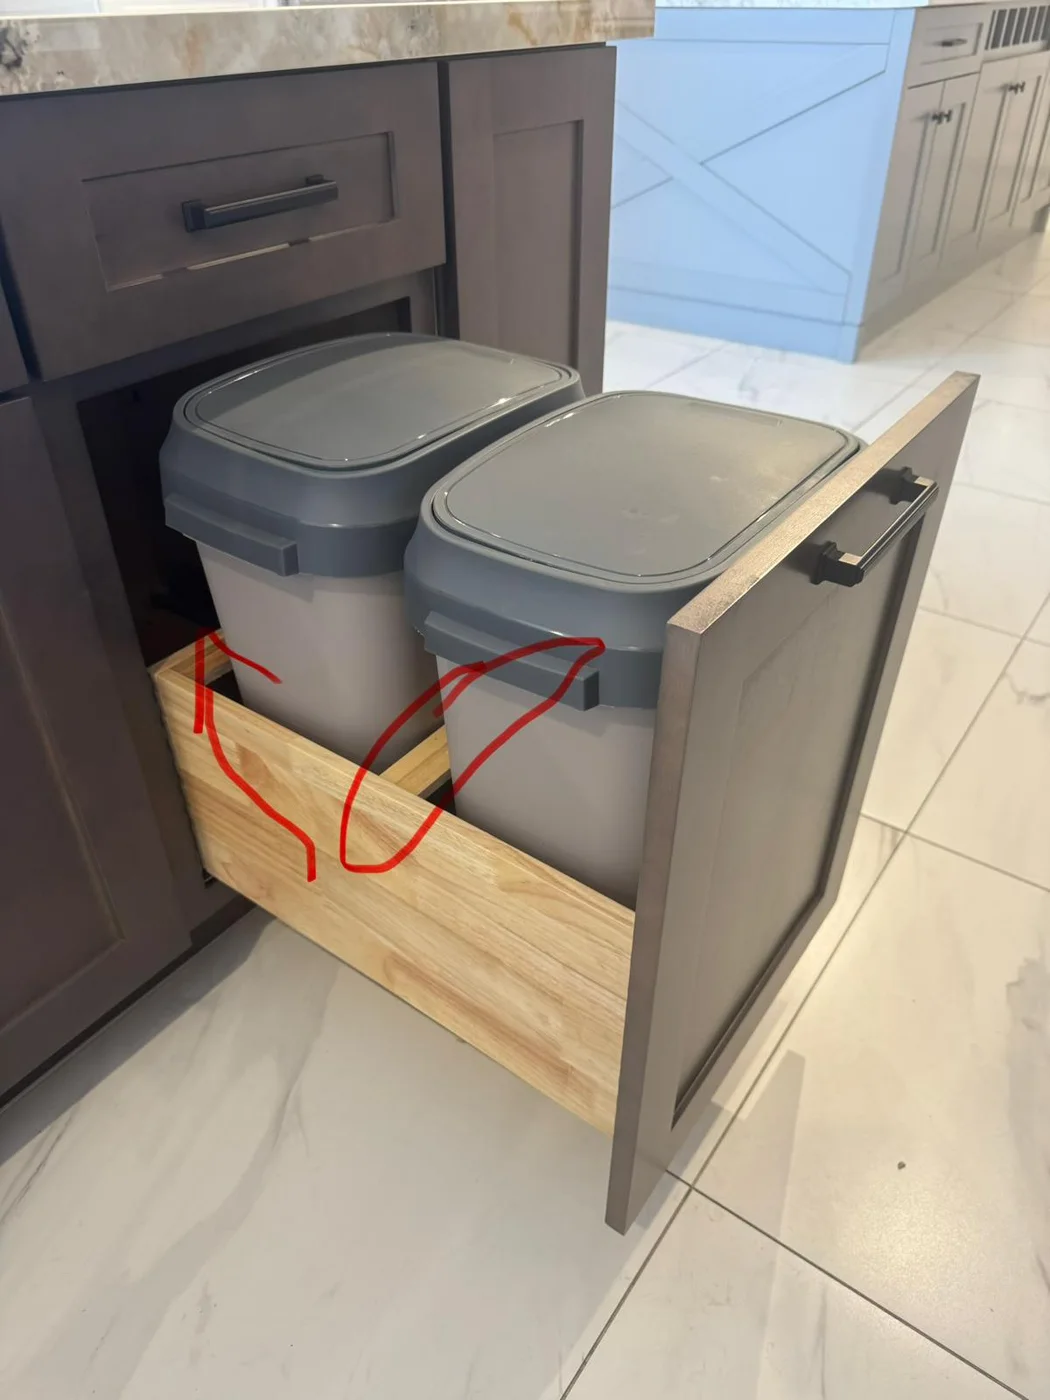
The kit includes a wooden spacer that normally sits between the two garbage bins. We found that this arrangement can make the rear bin difficult to lift out because it catches on the cabinet face frame.
Our preferred setup: trim the wooden spacer to a final width of 1¾ inches and install it at the back of the moving wooden drawer box (not at the back of the fixed cabinet). The two bins can then sit close together, in front of the spacer.
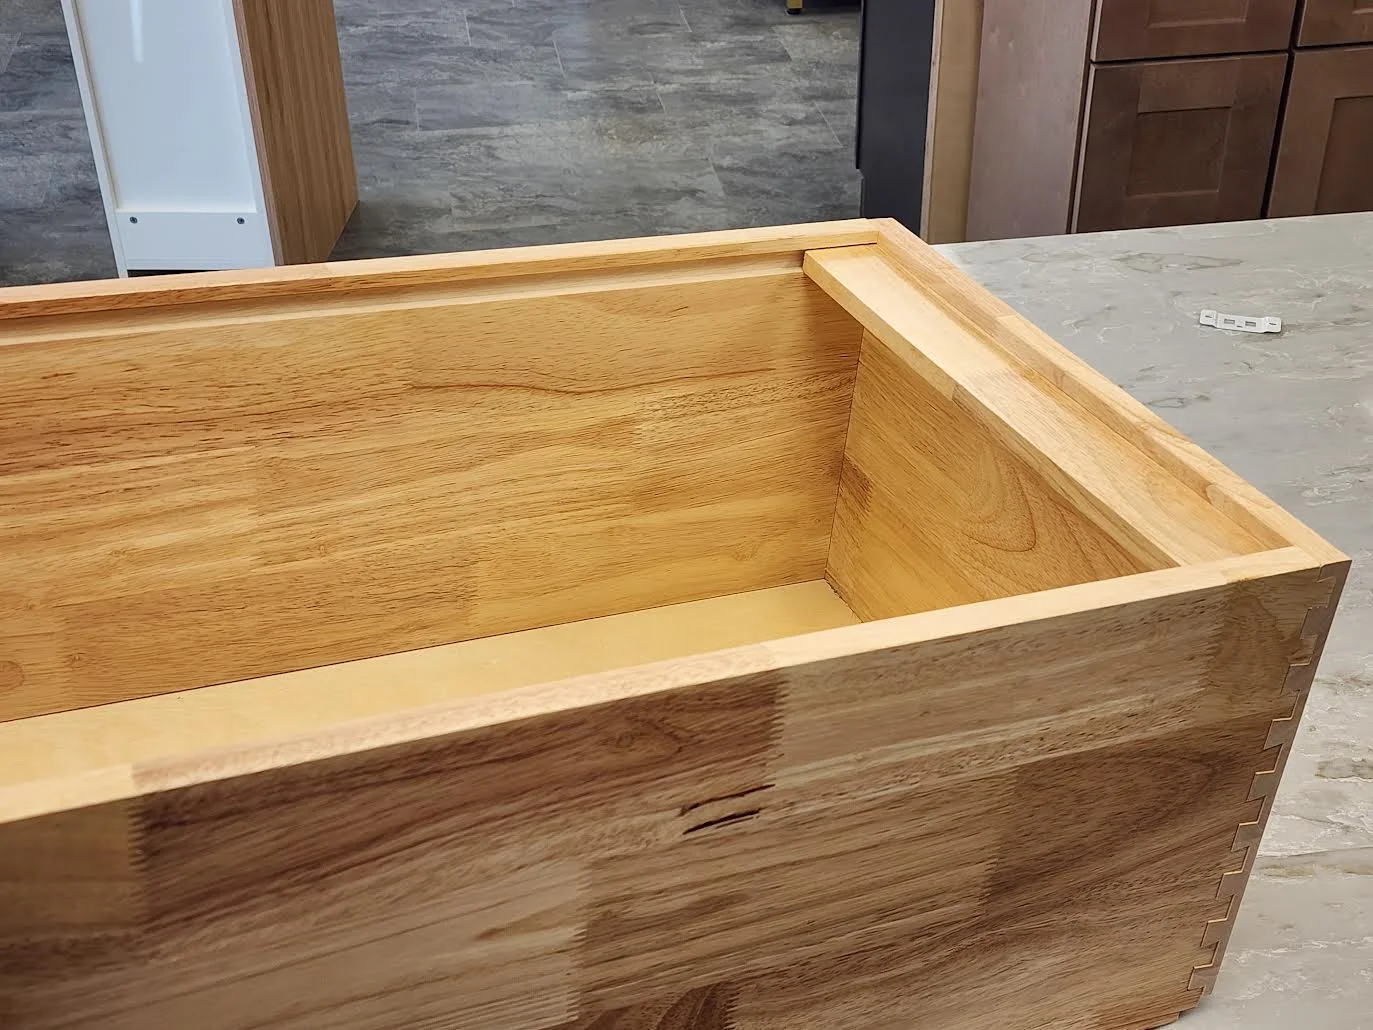
Place both bins in the pull-out, then lift each one out to confirm it clears the cabinet face frame. Make any necessary fit checks before using the bins.
Step 8Test the finished pull-out
Open and close the pull-out several times. Confirm that the front sits correctly, both slides run smoothly, the clips stay engaged, and each bin can be removed without catching on the face frame.